
March 31, 2024
Contents:
- Introduction
- Booting Up CP/M On The Commodore 128
- Basic CP/M Commands
- Doing Practical Stuff
- Playing Games
Introduction
Assumptions
This article assumes that you already know a little bit about the Commodore 128 and the Vice x128 emulator. You don't have to be an expert, but if you know what the Commodore 128 is, and know the basics of using Vice then you should be fine. Especially important is knowing how to attach disk images to Vice.
It is also assumed you understand that CP/M is an operating system that is different from the 128's regular Basic 7.0 system, and you want to learn more about it.
Tools Used
The instructions in this article were written using Vice 3.7 for x86_64 running on a Windows 11 laptop with keypad. They were also checked using a MacBook Pro running macOS 11.7.4 with the same version of Vice.
Booting Up CP/M On The Commodore 128
The Boot Disk
Unlike the other operating systems for the Commodore 128 (when it is in 128 or 64 mode) CP/M requires a special boot disk. This disk needs to be attached to the #8 drive for CP/M to start up.
The Commodore 128 came with a special, double-sided CP/M disk. Side one was used to boot up the system, and side two had some CP/M utilities. In order to boot up your Vice x128 emulator, you will need a copy of side one of that disk. You can download a good copy, which has fixed the Y2K bug, from our site. Once you download a copy, you'll see that it is labeled "CPMY2K.D71". This disk isn't exactly the same as the one that shipped with the original Commodore 128 hardware, but in my opinion it is better.
If you want the originals, you can download the two disk images (one for front and back) at http://www.zimmers.net/anonftp/pub/cbm/demodisks/c128/index.html The front of the disk is in the file cpm.system.622-3282252.d64.gz and the utilities from the back of the disk are contained in the file cpm.utilities.d64.gz.
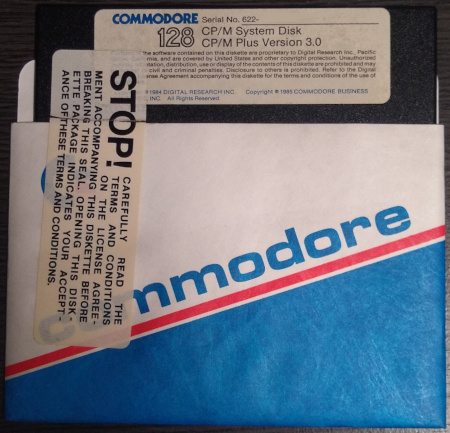
My original CP/M diskette! Booting Up CP/M
- Start the x128 Vice emulator. (Note: The Commodore 128 had two display modes: 40 columns and 80 columns. The emulator shows both of these at the same time, but you can only work in one of them. The 40 column one is green, and the 80 column one is black and twice as wide.)
- If you are working in the 40 column screen: press the 40/80 DISPLAY key once.
- You can do this a couple of different ways:
- Hover your mouse over the "80col:" section at the bottom of the emulator screen and click on it.
- Press the key on your keyboard that corresponds to the 40/80 DISPLAY key - on my computer that is the "/" in the numberpad.
- This will cause the emulator to boot up in 80 column mode when you restart it (and trust me, CP/M is much nicer and easier in 80 columns!) and will also cause the "80col:" section at the bottom of the emulator screen to turn green - which indicates that the button is pressed.
- You can do this a couple of different ways:
- Attach the CP/M boot disk image that you downloaded in step II.A above. You should attach it to drive #8.
- Type BOOT and press the return key. You can also do a soft or hard reset.
- You will see Booting... then Booting CP/M Plus and a bunch of stuff printed to the screen, finally you'll see CP/M 3.0 On the Commodore 128
- If you are not seeing anything on the black 80 column screen, then check the green 40 column one. If you are in this screen then CP/M still works - it is just more inconvenient to use. Since you can only see 40 columns of text at a time, you'll need to scroll right and left by typing Ctrl-right-arrow and Ctrl-left-arrow. I'd suggest that you press the 40/80 DISPLAY key and reset your system so that it boots up in 80 column mode.
- This all should take about 30 seconds or so.
- When you finally see the A> prompt and a blinking cursor then CP/M is booted and ready for your input.
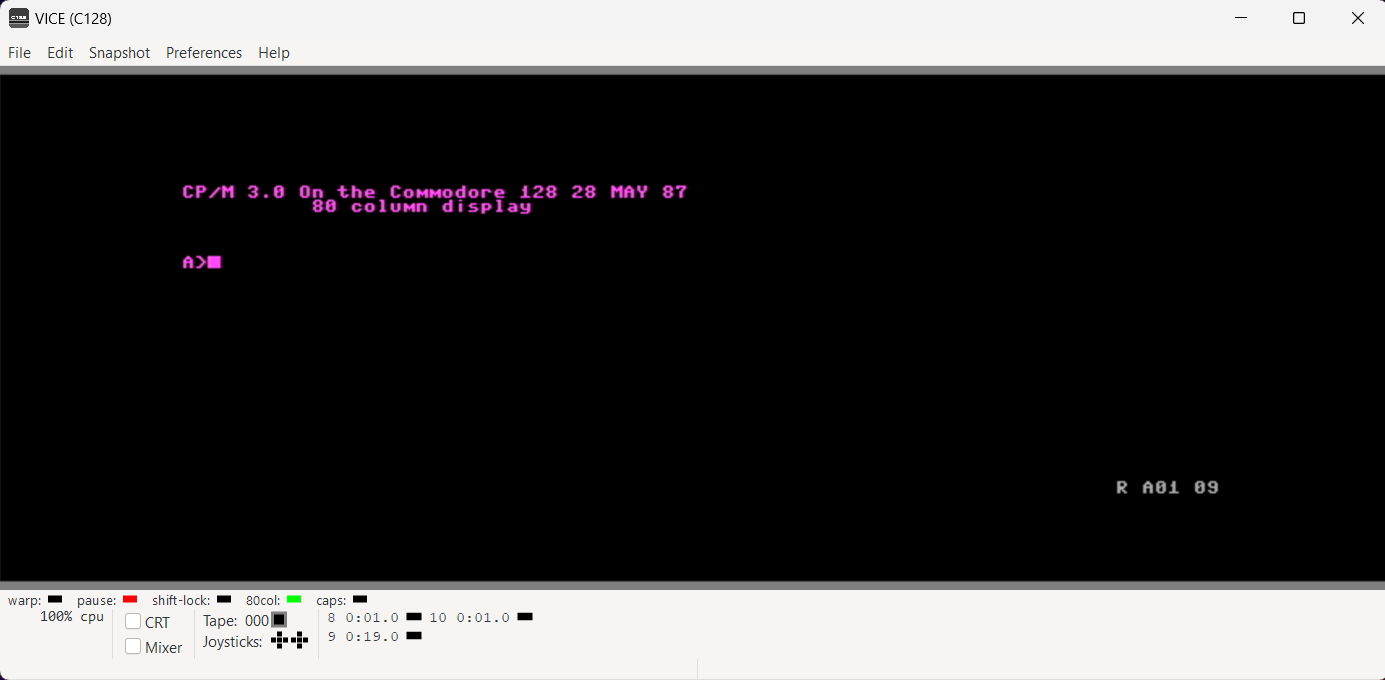
CP/M Booted Up and Ready!
Basic CP/M Commands
CP/M is *not* case sensitive, so you can type commands in upper case or lower case (or a combination of the two) - it doesn't matter.
- Date
Typing the command date by itself will tell you what date and time the computer thinks it is. You'll probably see something like Thu 05/28/1987 01:00:29 - which is most likely not correct!
You can set the current date and time by typing date set which will prompt you to enter the current date and time. Make sure to enter them in the *exact* format it asks for - especially don't enter years with four digits - or you will see the error message Illegal time/date specification.
Also, remember that pesky Y2K bug from the late 1990s? Well it may rear its ugly head again if you aren't using a patched version of CP/M. If you are using the disk image labeled "CPMY2K.D71" from step II.A above then you should be fine. If you aren't using a patched version then you will have problems if you try to enter a year greater than 1999.
Once you have the current date and time entered, try the date command again to verify that it is correct.
An important note about the current date and time: you need to set it *every* time you boot up CP/M, or it will use the defaults. This can be inconvenient, but if you are creating files where you want the correct date and time then it is worth the effort.
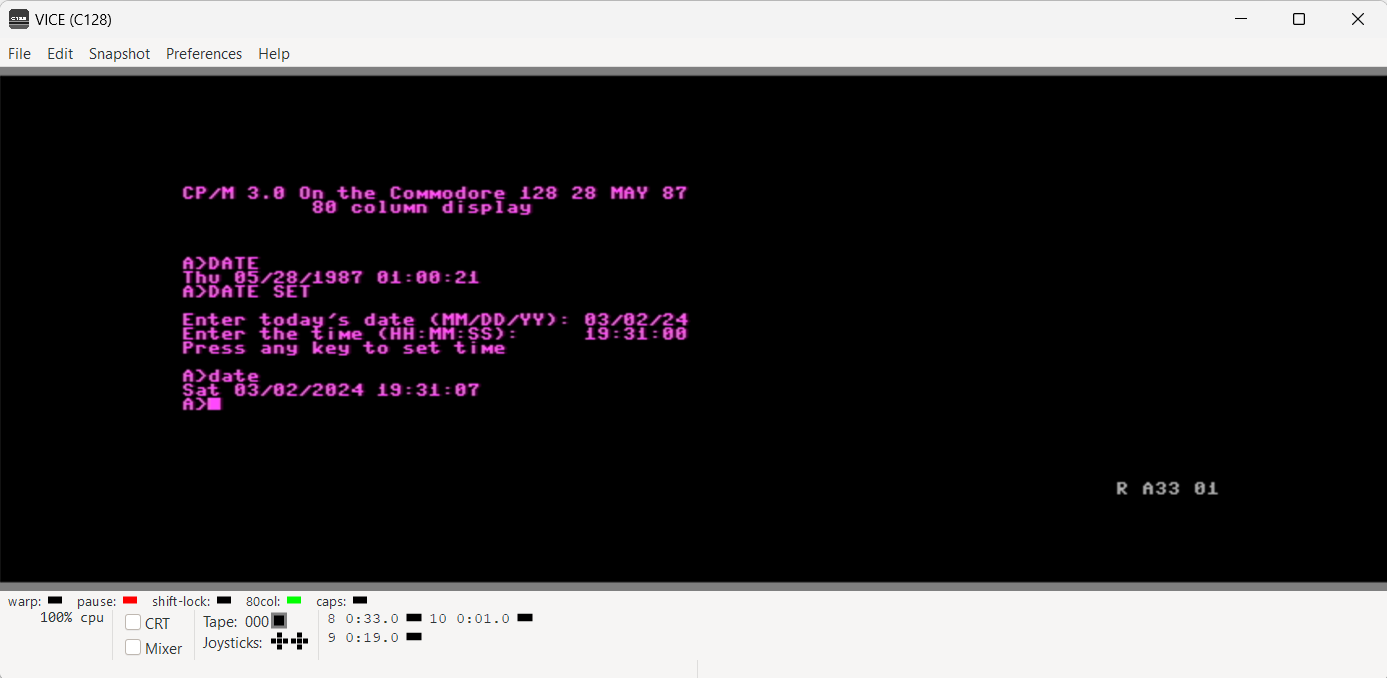
Date set - Dir
Dir is short for "directory" and will display a list of files on a disk.
Typing dir by itself will list the files on the current drive. The output of dir can be several lines long. Each line begins with the drive designation letter, something like A: and is followed by filenames, which are separated from each other by a colon.
Seeing something like A: CPM+ SYS : CCP COM means that there are two files listed - CPM+.SYS and CCP.COM. Filenames can be up to 8 characters long, and are followed by a 3 character extension - which usually indicates the file type. Note that even though you don't see a period between filename and extension in the dir listing, usually whenever you refer to a file you will type the period: INFO.DAT not INFO DAT.
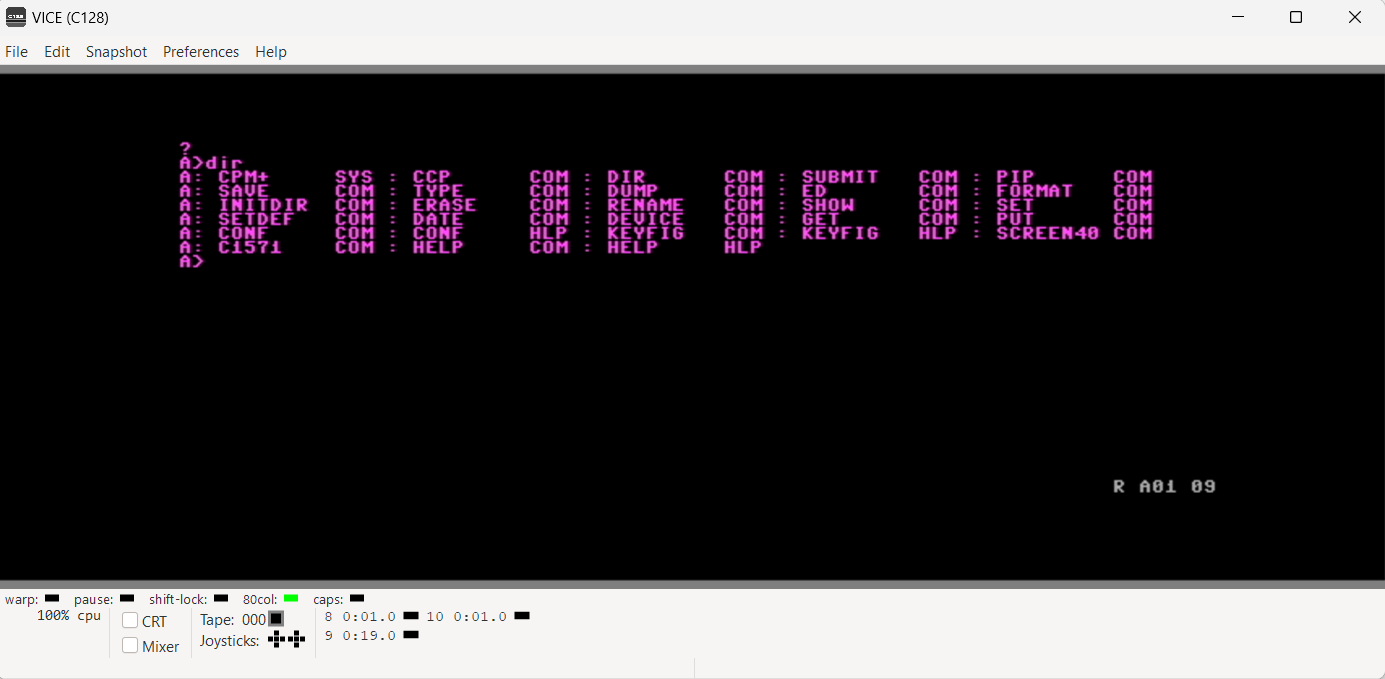
Results of DIR - Help
Help is a feature that has different topics available, depending on what disk the system is operating on. For this section I am assuming you are working with the system boot disk labeled "CPMY2K.D71".
Typing help by itself will clear the screen, display the help utility and list the topics available. It also changes the input prompt to HELP>. You can look over the topics available, and type one of them at the prompt to get more information.
Try typing dir at the help prompt. The help utility will give you information about the dir command, and display a list of subtopics - in this case BUILT-IN" and WITHOPTIONS. To see more about either of those subtopics you need to type a dot followed by the subtopic name, like this: .BUILT-IN. The system will display more information, and give you some more subtopics. You can follow this to your heart's content.
Typing a question mark at the help prompt will display a list of help topics. If you want to jump directly to a subtopic you can type the main topic followed by a space followed by the subtopic: dir withoptions.
To exit the help utility just press return at the help prompt, and it will return you to the A> prompt.

CP/M 3.0 HELP Screen - Using More Than One Disk Drive
It is common to use more than one disk drive with CP/M, and it is easy to change between drives - at the prompt just type the letter of the new drive, followed by a colon. But first let's go over how to set up more than one drive in the x128 Vice emulator, and how to create new disk images for it, then we can learn some commands to help us practice working with multiple drives.
- Setting up multiple drives in Vice x128
The first thing we need to do is set the drive type for drive #9, so that we have access to a second disk drive we can use:
- Go to Preferences > Settings > Peripheral devices > Drive
- Click on Drive 9
- Set the Drive model as CBM 1571
- Make sure "Save settings on exit" is clicked
- Click on Close
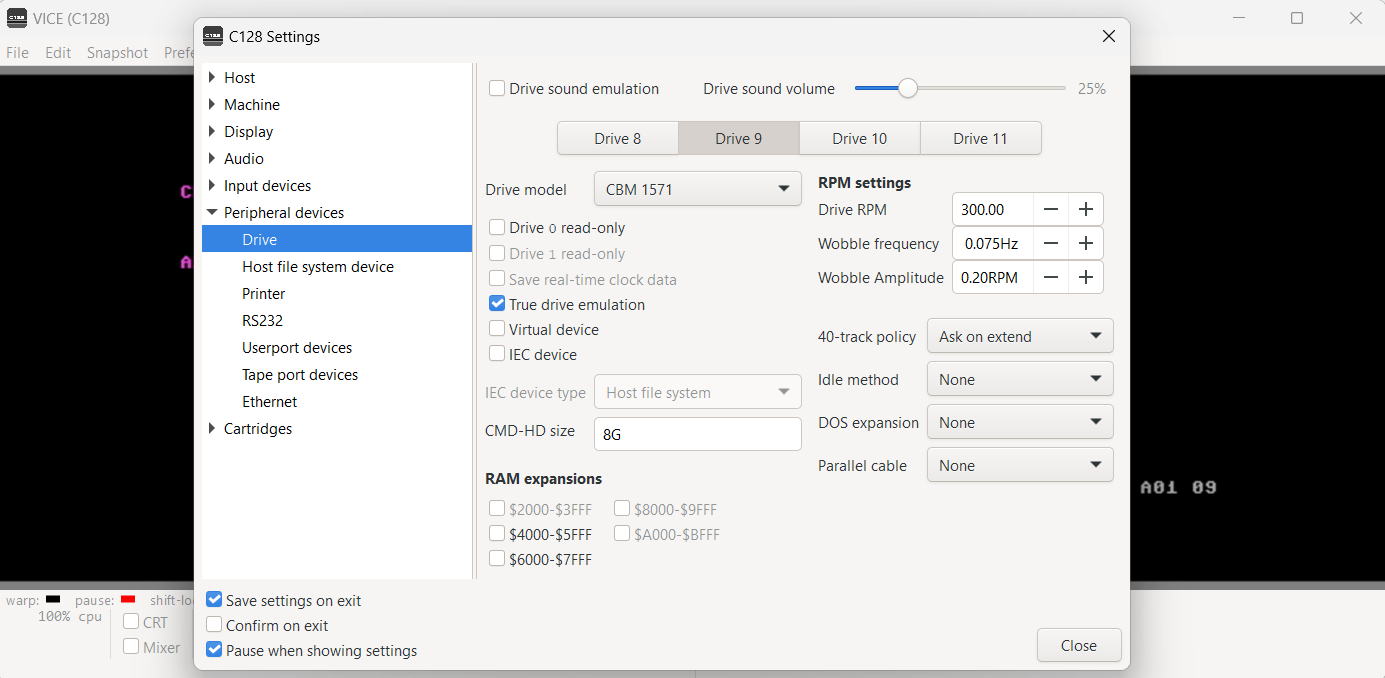
x128 Drive Setup - Create a new disk image in Vice x128 and attach it to drive #9:
- Go to File > Create and attach an empty disk image...
- Select unit #9
- Set disk type to d71
- Type the name of the file in the field at the top. This is the name you will see on your host computer's file system. (Be sure to check your path, as it likes to default to the place that vice is located!)
- Type the name of the disk image in the field at the bottom. This is the name you will see when using the disk in CP/M.
- Click save
- Type dir b: to list the contents of the disk in drive b - it should just show a bunch of colons at this point

x128 New Disk Image
- Setting up multiple drives in Vice x128
- Format
Now that we have a second disk drive available, and a blank disk image we can use, we need to format the disk for CP/M use. (This was a common practice back in the day when many vendors used the same disk size, but had their own file systems.)
First, we need a CP/M disk that has the format command on it. (The front of the original CP/M system disk, listed in step II.A above will work.) Make sure this disk in in drive A: and the new disk image you created is in drive B:
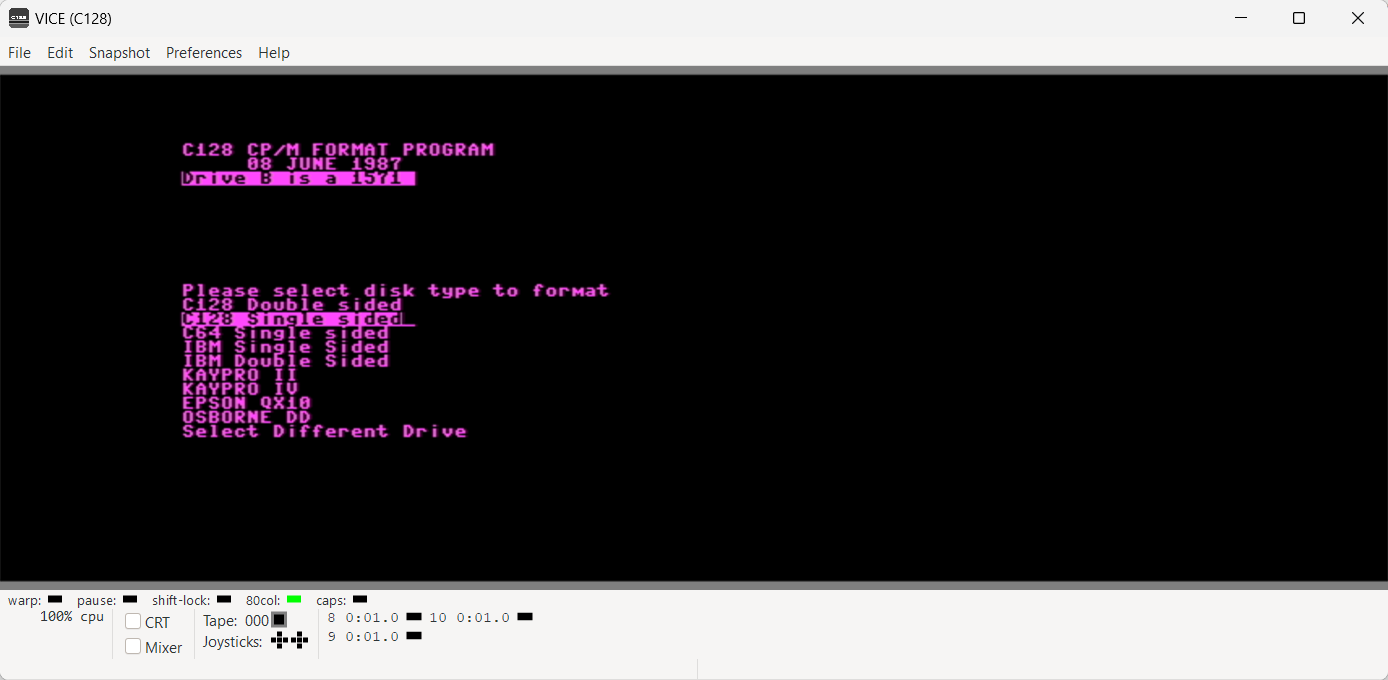
- From the A> prompt type format and press return
- From the format screen, use the down arrow key to move down and highlight Select Different Drive and press return
- Highlight Drive B and press return
- Highlight C128 Single Sided and press return
- Type $ to continue with the formatting
- Wait... this takes a minute or two to complete
- Type n so the system won't format another disk. This will exit the format program.
- Now type dir b: - it should say No File since the disk is empty
CP/M disk format screen - Pip
Note: For the next few commands, make sure you have the front of the original C128 CP/M disk in drive A: (See step II.A above)
Pip (which stands for Peripheral Interchange Program) is the name of the program that copies files in CP/M. Let's try it out by copying a text file from A: to our newly formatted disk in drive B:
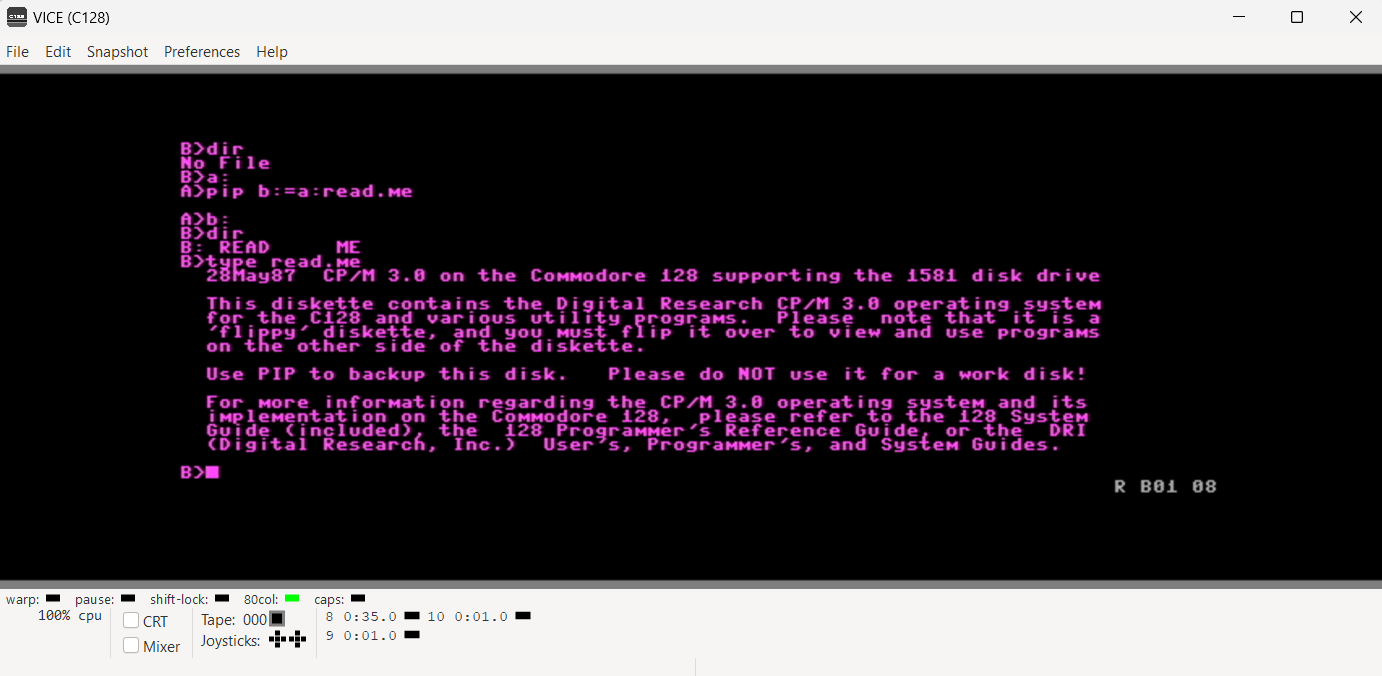
- From the A> prompt, type pip b:=a:read.me and press return. This will copy the "read.me" file from A: to B:
- Type b: to change to that drive
- Take a look at the directory now and make sure the file copied correctly
Pip is a powerful command with lots of options, try the help command to look at all the stuff it can do.
- Type
Note: The next three commands we'll discuss (type, rename and erase) are built-in commands. That means they are always available, and are not required to be loaded from disk. DIR is also a built-in command.
To display a text file on screen we use the "type" command. From the prompt type type read.me and press return. You should see some information about CP/M 3.0 on the Commodore 128.
TYPE can be abbreviated as TYP, so entering typ read.me would produce the same results.
CP/M PIP and TYPE - Rename
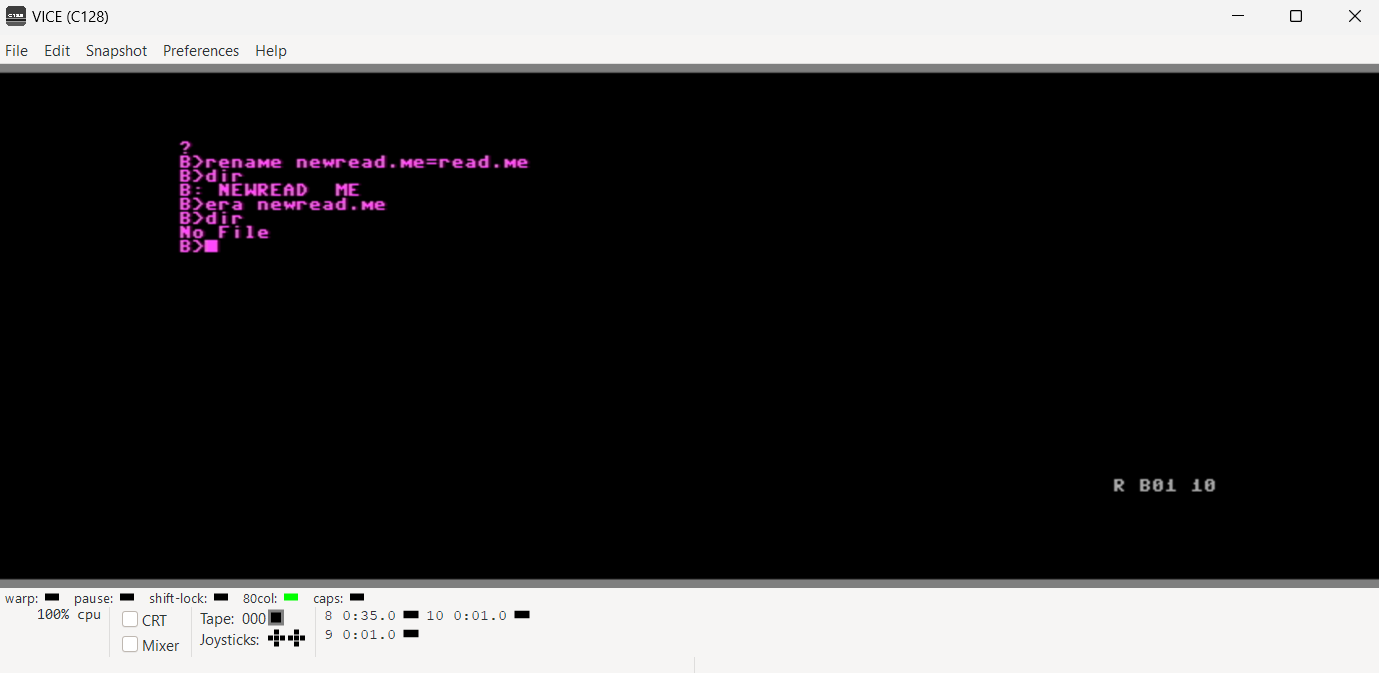
To rename a file, use the rename command followed by the new file name, an equals sign, and the old file name. Make sure you're using the B: drive, and try it out by typing rename newread.me=read.me . Use DIR to confirm that the filename was changed.
RENAME can also be abbreviated at REN.
- Erase
Deleting, or erasing, a file is also super easy. Just type erase followed by the name of the file you wish to erase. Let's try it out by using its abbreviated command - type era newread.me and use DIR to confirm that the file no longer exists.
CP/M RENAME and ERASE
There are more CP/M commands, but these are the basic ones that will help you get around the operating and file systems. Use HELP, or see the CP/M manual, for other commands. You can find an online copy of the CP/M Plus User's Guide manual at https://www.oldcomputers-ddns.org/public/pub/manuals/cpm3_users_guide_(600).pdf.
- Date
Doing Practical Stuff
CP/M is about more than just issuing commands, you can actually do practical stuff too! In this section we'll go over some of the useful things you can do.
- ED
ED is CP/M's text editor. One of its original purposes was to enter and edit source code files. If you've never used an old school editor before, and are use to modern editors, then be aware that ED is not intuitive nor is it easy to use! However, I doubt you are going through this tutorial in hopes of finding a new text editor that you can use in your daily life ;-).
Keep in mind that ED is a line editor - meaning that it works with text on a line-by-line basis. Also, it uses the concept of a character pointer (CP) to move between lines and characters on a line. You won't see any actual pointer in ED, but to be proficient with it you'll need to keep track of where it's at.
For this part of the tutorial I am going to assume that you have a disk in A: with the ED command on it (most boot disks have it), and that you have a work disk in B: where you can save the text file we'll be working with. And since we'll be creating and working with files in this section, be sure to set the current date and time - if that is important to you.
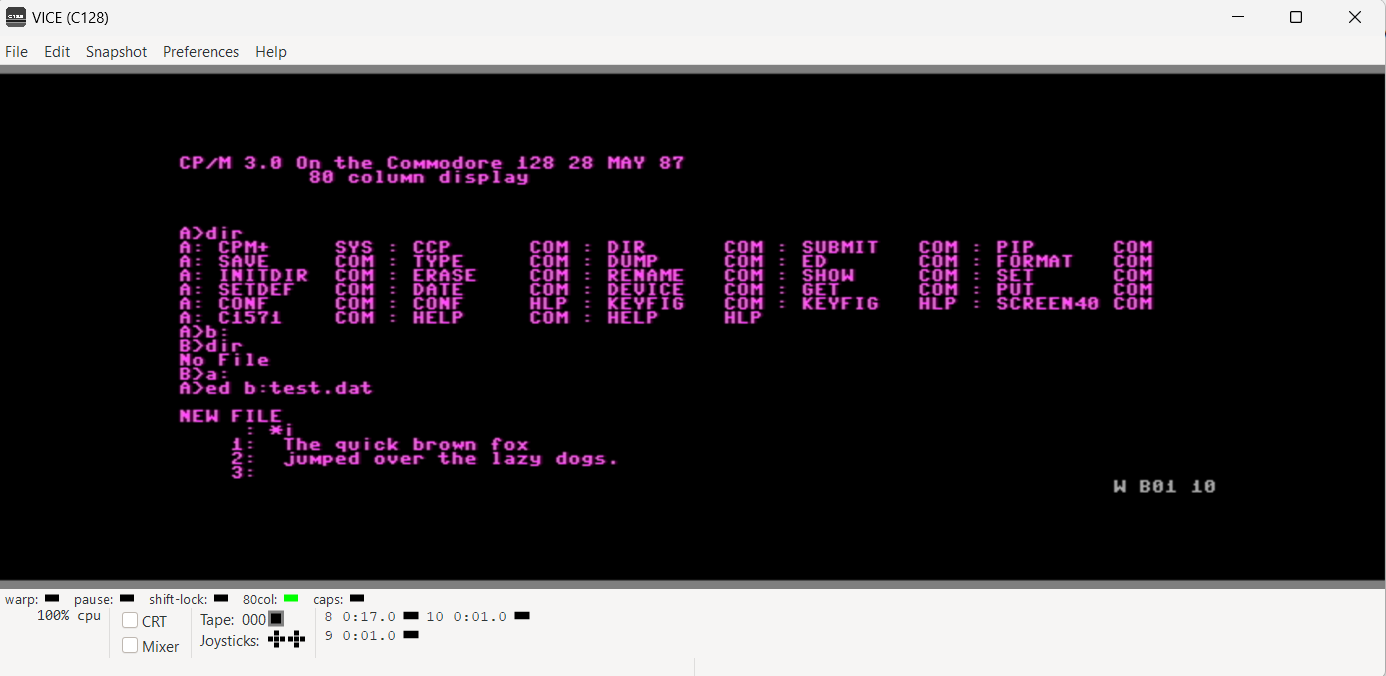
- From the A: prompt, type ed b:test.dat . You should see NEW FILE , then : * - this means ED is in command mode and awaiting your input.
- Type i to enter input mode. This will allow you to enter text one line at a time. (Note: if you type uppercase I it will convert all the chars you type to uppercase!)
- Type in at least three lines of text, pressing return after each line.
- If the backspace or delete buttons don't do what you think they should do, then try using Ctrl-h to delete characters.
- When you are finished typing in text, use Ctrl-z to return to command mode again.
- Type e to save the file and exit ED. You can check that your file was created by issuing the DIR command on B: and you can view your new file by using the TYPE command.
- Now let's edit the file you just created. Type ed b:test.dat
- Type #a to append (or read) the file into the memory buffer so you can work on it.
- Type b to move the CP to the beginning of the file.
- Type 10t to type (or display) the first 10 lines of your file.
- Let's replace the second line of text
- Type b to move the CP to the beginning of the file.
- Type 1 to move the CP down one line. This will also display the text of that line.
- Type 1k to kill (or delete) one line.
- Type i to enter insert mode.
- Type in some text for a new line, pressing enter and then Ctrl-z when you are done.
- Type b to move the CP to the beginning of the file.
- Type 3t to display the first three lines of your file, and verify that line #2 is the new one.
- Now let's add some text to the third line.
- Type b to move the CP to the beginning of the file
- Type 2 to move the CP down 2 lines, so it is at the beginning of line #3
- Type 3c to move the CP 3 characters to the right
- Type iXXX <ctrl-z> <return>
- Move your CP back to the beginning of the file, and display four lines to verify that the text was inserted at the proper point.
- You can continue to edit your file, or type h to save without exiting (although you'll need to use #a to append the lines into memory again), or type e to save and exit to the CP/M prompt.
As you can see, it takes some practice to get used to editing text with ED! However, there are a lot of other commands you can use with it. For more information about using ED see the Ed Command summary listing in section 5 of the CP/M 3 User's Guide, on page 5-30, and section 6 - which goes into much more detail about it. You can find an online copy of the CP/M 3 User's Guide manual at https://www.oldcomputers-ddns.org/public/pub/manuals/cpm3_users_guide_(600).pdf.
CP/M ED - Wordstar
WordStar was a word processor that was popular on CP/M machines in the early 1980s. Even though it is much easier to use than ED, it is still quite a bit different than today's word processors. Let's give version 3 a try and see what it's like.
You can get the WordStar 3.3 program at http://www.zimmers.net/anonftp/pub/cpm/prod/index.html. If you get WordStar at this link you'll notice that it is in .d81 disk format. This means you'll need to have a 1581 virtual drive set up to read it. (See section III.D.1 above if you need help doing that.)
We are going to be saving our test WordStar document to the same disk that has the WordStar command on it. However, if you want to save your WordStar documents on a different disk then either prepend the drive name, such as b: , to the filename, or change your logged in drive. (One more piece of fun-ness: to save files to a different logged drive, make sure you first copy the file "WSOVLY1.OVR" to the disk where you want to save your documents - otherwise you'll see an ERROR E46 message!)
Note: If you get stuck and find that the Esc key isn't working, you can use the F9 key instead.
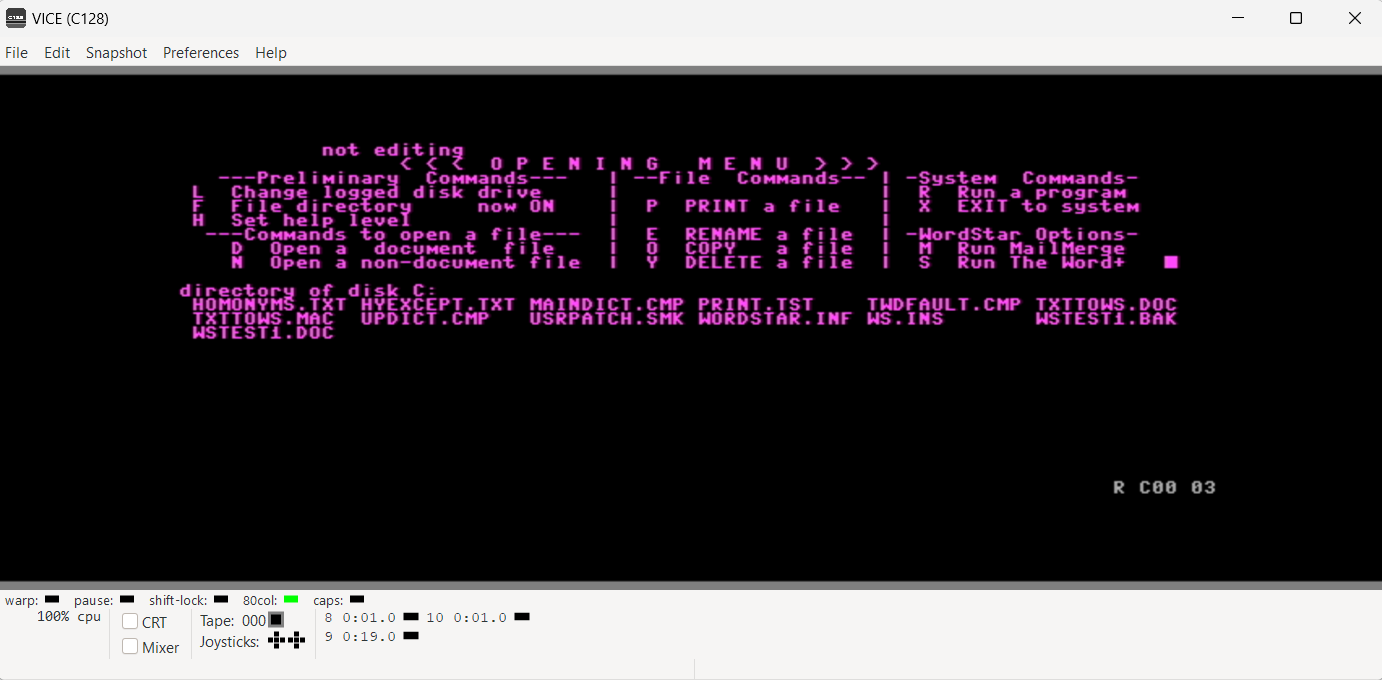
- Attach the disk image and type ws at the prompt. After seeing a couple of introduction screens, you'll end up at the Opening Menu page. This screen has a few sections:
- The Status line. This is the top line of the screen, and in the upper left corner it probably says not editing right now, but that will change when we start doing things.
- Below that is the Menu area, which shows a list of commands you can enter. Commands are grouped by type in this area.
- Next is the Directory area, which shows most of the files on the currently logged in (working) disk.
- The blank area at the bottom of the screen is the Text area.
- Type d (don't press return) to open a new document file. When you do, notice that the cursor jumps to the Status line, waits a second and then displays some new text in the Menu area.
- Type a name for your new file, something like wstest1.doc and press return. WordStar will tell you that it is a new file, and then present you with a new status line and a text area where you can type.
- Type some lines. When you are done press Ctrl-k , release them, and press d . This will save your file and return you to the Opening Menu page.
- Now let's edit our file: press d again to edit a document, but this time type the name of the file we previously created. It will load the file and return you to the text area so you can edit it.
- Make some edits, but this time save your document by pressing Ctrl-k s - which will save and resume editing.
- When you are all done editing, type Ctrl-k d to save and return to the Opening Menu. Notice that the directory area lists your new file, and also a backup of it - indicated by the .BAK file extension.
- Press x to exit WordStar and return to the system prompt.
WordStar is actually pretty cool, and has a lot of commands that come in quite handy. Take a look at the manual to learn more about what it can do and how to use it. You can find the manual at http://www.bitsavers.org/pdf/microPro/Wordstar_3.3/Wordstar_3.3_Reference_Manual_1983.pdf.
Wordstar's opening menu - Attach the disk image and type ws at the prompt. After seeing a couple of introduction screens, you'll end up at the Opening Menu page. This screen has a few sections:
- dBase II
dBase II was another killer application for CP/M in the early 1980s. Once again, the user interface isn't anything like what we have today but it is still interesting to see what using it was like. Let's try out version 2.
You can get a disk image with dBase II on it at http://www.zimmers.net/anonftp/pub/cpm/prod/index.html.
- Attach the disk image to a virtual 1571 drive, and type dbase to start up the application.
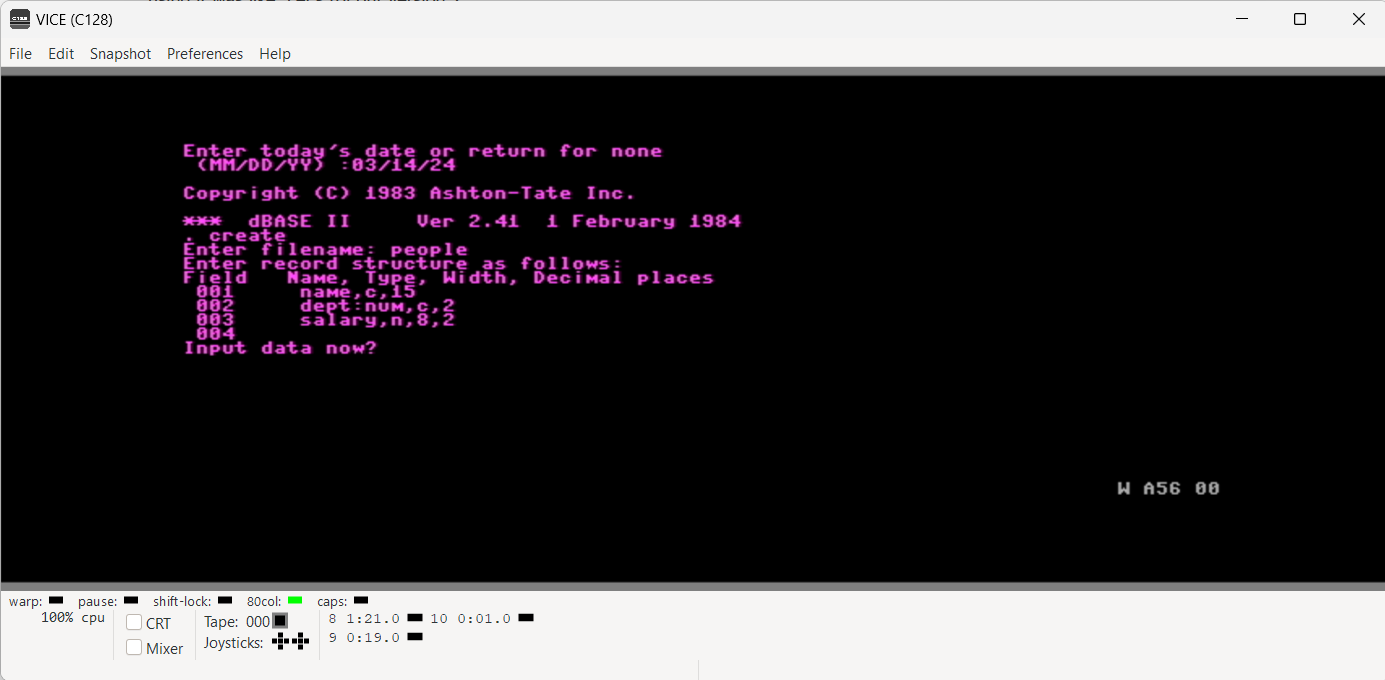
- You will first be prompted for today's date. You can enter that, or press return to skip it. It will then show you a couple lines of info about the program and present you with a dot prompt. dBase II uses a dot as the prompt, and this lets you know that it is ready to accept your commands.
- Let's create a new database: enter create
- When it prompts you for a filename enter people - you can use either uppercase or lowercase letters.
- It will then ask you to enter record structure. Type name,c,15 for 001. This means that your first field will be named "name", be of type character, and can be up to 15 characters long.
- For field 002 type dept:num,c,2 and for field 003 type salary,n,8,2 .
- For field 004 just press return without typing anything.
- It will ask you if you want to input data now, type y .
- You can now enter your first record using the fields that you just set up. Enter a few records - here is an example of what you can enter: name = Alazar, Pat , dept:num = 75 and salary = 50000.00 .
- When you are finished you can exit record entry by just pressing return at the name prompt. This will take you back to the dot prompt.
- Now let's look at a list of all the records in your database. Type use people , press return, enter list . This will display the records you've entered.
- Let's try sorting the records in alphabetical order. Type sort on name to abcorder , then use abcorder then list again.
- If you want to enter more records, use the "append" command.
- To end your dBase II session type quit at the dot prompt. This will exit the program and return you to the CP/M prompt.
- The next time you start up dBase II you can continue working with the people database, just type use people at the dot prompt then you can issue commands against it.
We've really only just scratched the surface of what dBase II can do. You can learn more about it by checking out the manual at https://archive.org/details/bitsavers_necAPC8190rsGuideFeb83_9145866/mode/2up?view=theater (That is actually the manual for version 2.3 on CP/M-86, which isn't exactly the same as the one we're using here, but it is close enough!)
dBase II - SuperCalc2
SuperCalc2 was a spreadsheet that was popular on CP/M machines in the early 1980s. It was a competitor to VisiCalc and Lotus 1-2-3. Its layout is similar to other spreadsheet programs, but the commands are a bit different. Let's give it a try.
You can download the disk image for SuperCalc2 version 1.00 from our site: SuperCalc_v2.d71.
- Remember to set the current date and time for your system.
- Attach the disk image to a drive.
- Type sc2 to start up the application.
- Press return to start a new spreadsheet
- It will display a new, empty sheet and it is ready for input into cell A1. We know it is cell A1 because that cell is highlighted in reverse text, but also the status line (3rd from bottom) displays > A1 . Keep a close eye on the status line because sometimes it is difficult to tell where the highlighted cell is!
- Before jumping in, let's go over some basic commands and concepts in SuperCalc2:
- Notice the small arrow on the status line, that tells you which cell will be highlighted next, after you press return.
- To change or edit the contents of a cell, just move to the cell and type the new value.
- To delete (or blank out) the contents of a cell type /b
- If you make a mistake when entering the contents of a cell, don't use the backspace or delete keys - they won't work. Instead use the arrow keys to go back to your mistake and then just type over it.
- If you get stuck at any point and aren't sure what to do, just type ? and SuperCalc2 will give you context sensitive help - cool!
- Ctrl-z will cancel an operation.
- Let's create a small, basic worksheet:
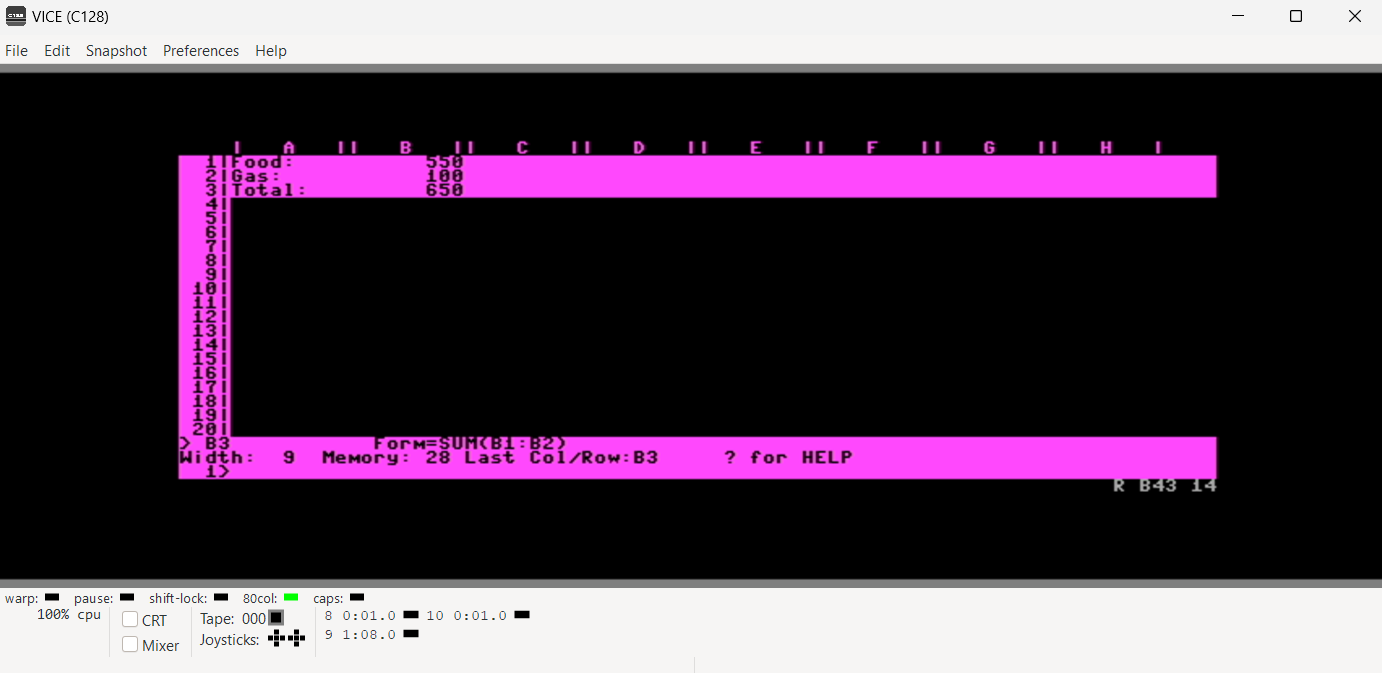
- To enter text into a cell start by tying one double quote. In cell A1 type this: "Food:
- In cell A2 type: "Gas:
- In cell A3 type: "Total:
- Now move to cell B1. To do that use the arrow keys and notice that the cell number changes on the status line. Or type = and cell number to jump to that cell, like this: =b1
- In cell B1 type a value, like this: 550
- In cell B2 type another value, like: 100
- In cell B3 enter a sum command by typing sum(b1:b2) - notice that SuperCalc will automatically update the cell contents and the worksheet.
- To save your worksheet we need to use what is called a "slash command".
- Type: /s
- Type the name of the file to save, something like wksht1
- Type a to save the whole worksheet, not just part of it
- Now that you are done with our super simple example, here are some more Slash Commands that you can try out:
- /z = delete entire worksheet
- /q, y = exit without saving
- /l, name, a = load all of the worksheet called "name"
The disk has some sample worksheets on it that you can load and play around with. One good one is called "sample" - try loading it and see what it has.
Once again, we have barely touched on what SuperCalc2 is capable of doing. Take a look at the manual at https://deramp.com/downloads/altair/software/manuals/SuperCalc2.pdf and try out some of the other things you can do with this cool program!
SuperCalc2 - Turbo Pascal 2.0
Turbo Pascal was a popular compiler and integrated development environment for both CP/M and DOS in the 1980s. Let's take a look at version 2.0, which came out in 1984. You can get a copy of the Turbo Pascal 2.0 disk at http://www.zimmers.net/anonftp/pub/cpm/programming/index.html
- Insert the disk into drive B:
- Type turbo to start the program
- Type y to include error messages
- Press e to edit, then enter a new file name
- Enter some lines of Pascal. Here is a good, small program:
program Hello;
begin
writeln('Hello World!');
end. - Press Ctrl-k Ctrl-d to exit, then at the > prompt press return to see the menu
- Press s to save your file
- Notice that "Work file:" now shows the name of the program you are currently working with
- Press c to compile
- If there is a problem compiling, you will see an error # and an error message, usually followed by Press <ESC>
- If the "Esc" key doesn't work, try the F9 key
- This will return you to the source code, and place the cursor on the offending line
- Fix the problem, then return to the menu to save and compile again
- Press r to run your program
- To make an executable program:
- From the main menu, type O for compiler Options
- Type c to move the arrow to Com-file
- Type q to quit to the main menu
- Type c to compile. This will take a minute as the program creates and writes your .com file to disk
- Type d for Dir, then *.com as the directory mask - you should see your newly created .com file listed
- You can execute it right from Turbo Pascal by typing X for eXecute, then the name of your program, like "test.com". It will run and you will see your output
- You can also run your program by returning to the main menu, typing q to Quit, then typing the name of your .com program from the system prompt
If you are interested in learning more about Turbo Pascal you can find the 2.0 manual at https://archive.org/details/bitsavers_borlandturVersion2.0Reference1984_8178030/mode/2up (If you refer to the appendices, remember to use appendix A for CP/M-80, since the C128 uses the Z80 chip for CP/M!)
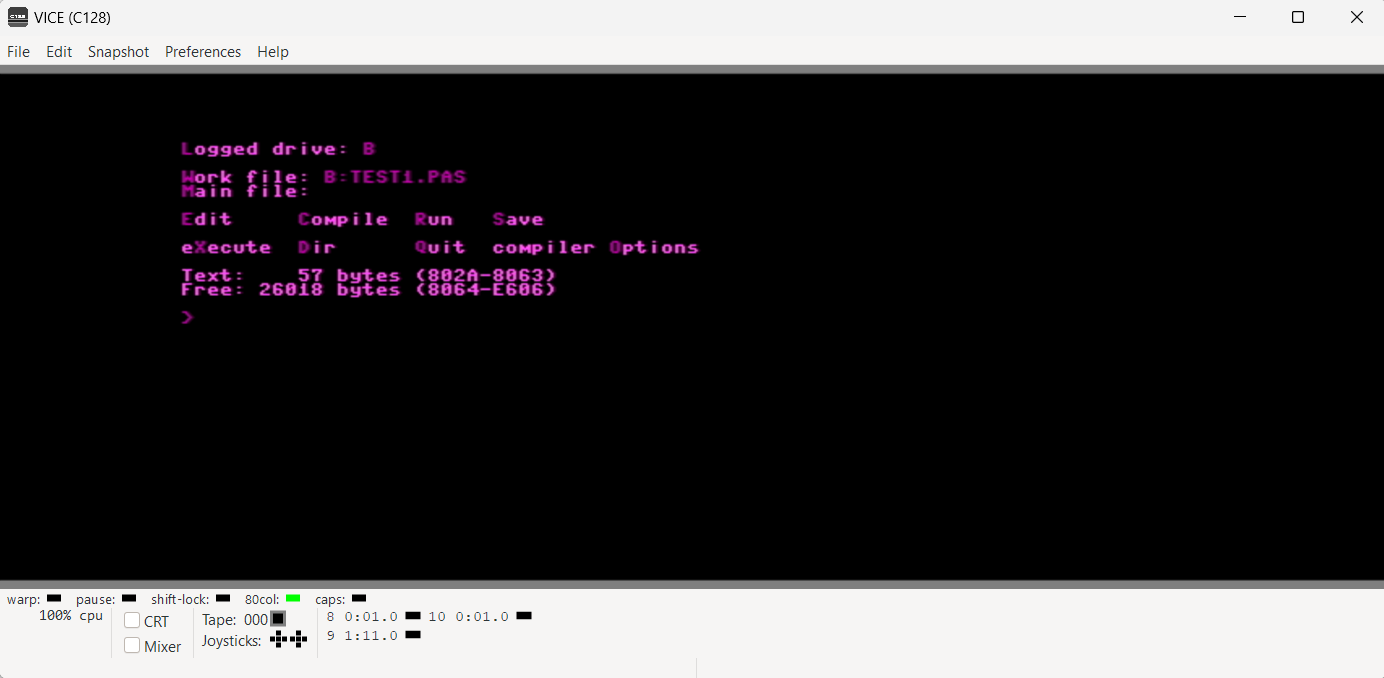
Turbo Pascal's Menu
- ED
-
Playing Games
- Adventure
Adventure, a.k.a. Colossal Cave Adventure, is one of the first (if not *the* first) text adventure games. It started life in the mid 1970s on the PDP-10 mainframe computer. Originally written by Will Crowther, the game underwent several expansions (mostly by Don Woods) over the next couple of decades. Versions of the game are often differentiated by the number of total points possible. There are several CP/M versions of the game, but let's try out the 550 point version known as B01, which is Mike Goetz's CP/M port from the spring of 1981.
- You can download a zip file containing several versions of the game from our site.
- Attach the disk image for adv-B01.d71 to one of your CP/M drives.
- Type adv to start the game
- You will see a welcome screen and a prompt asking if you'd like instructions. You can type yes or no, but either way you'll eventually start the game when it tells you where you are standing and you see the > prompt.
- This is a game like all other old school text adventures - meaning you tell the computer what to do by inputing one or two word commands. Try it out now by typing enter building
- You can pick up objects by typing something like get lamp (That command is also the name of a fine documentary about text adventure games!)
- Type inventory to see what you are currently holding.
- Exit the house and go down, do a bit of exploring until you find the entrance to the Colossal Cave.
- The goal of the game is to find the many treasure items and return them to the well house.
- There are many commands, but here are a few more useful ones that you should know:
- help will tell you more about how to play the game.
- drop will let you drop some item you are carrying.
- score will show you how many points you currently have.
- quit will exit the game after showing your score and opining on your exploring abilities.
- news will give you some information about this version of the game.
Adventure is fun game that can provide many hours of happiness! There are many places where you can get help, hints, maps and more. Here are a few good ones:
- Take a look at the file "ADVENT.WS" on the disk image. It is a walkthrough for the game - but be careful to not read more than you want!
- A great online resource for all things Adventure (including maps!) can be found at https://rickadams.org/adventure/.
- Our site has an instruction manual for the Commodore 64 version of Colossal Adventure. That one is by Level 9 Computing, and isn't quite the same as this B01 version, but it does have some good hints!
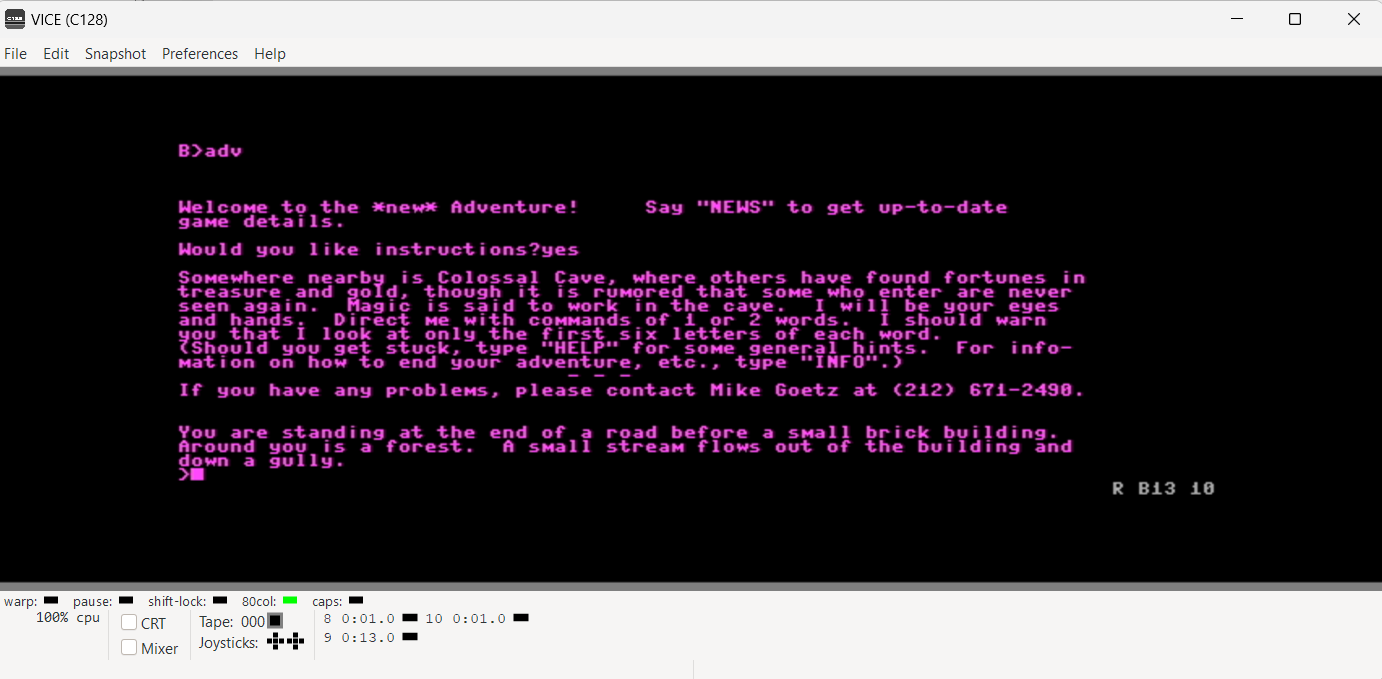
Adventure on CP/M!
- Adventure